Decorating with Mirrors and Mirrored Furniture... At My House.

Hello everyone and happy "hump day". Coming at you with a little (ok, kind of big) post all about how I decorate with mirrors around my home. This post is also full of tips on how you can really open up and glam-out your own space (on a budget) with these reflective beauties.

First things first.  You should change the way you think about mirrors. Yes, they're functional. But if you don't think of them already as decorative objects that can work some major magic, then, well...start thinking of them that way. ;)  You'll be shocked at how a few well-placed mirrors can make a small space seem larger and glam-up any room in a sophisticated way.  Oh and we're not just talking about wall mirrors, guys. We're talking mirrored accessories and furniture too.

So first of all, lets start with mirrors in small spaces. If you've got a smaller room, or a wall that blocks off a space, you can really open it up and make it more visually appealing with a few mirrors.
For example, this wall in our family room.

It kind of blocks off the right side of the room. So to make the wall feel less "enclosing", I added this fun peacock mirror.
 
 You can find (uber expensive) versions of these all over the place, but mine is from Wisteria. It looks super heavy and substantial, but it's just foolin' ya. It's sort of hollow. Anyway, I love how the little inlaid mirrors create a sparkly effect and reflect the bookcase and the rest of the room to give the wall some depth.

Same for our little "sitting room/formal living room/whatever room"

This has always been one of my favorite rooms in our house. It's right off our entry way.  You can see just how small the space is. So this room is dealing with a few things... its small size and the wall on the back (which is an exterior wall) so it makes the house look a bit enclosed.
To make the room look endless, I added this gorgeous mirrored console table (I scored for a MAJOR deal at the Ballard Designs outlet) and three mirrors (which I also scored for an even more MAJOR deal at the same place). These babies were $30 a piece. Usually, well over $200. Told ya. MAJOR deal.

The illusion of the rug reflecting in the table is my fav. It makes the wall and room look so much larger.

Another example of "extending" a room with a wall mirror is in our dining room.
 Yes, this is one of my more "dramatic" rooms. I think you can get away with really fun things and bold colors in a dining room. It's one of those places that should just make you happy. Anyway, this wall just wouldn't be the same without a big mirror. Since the room is painted a darker shade (Behr Cinnabark...LOVE), I added this large beauty and a few mirrored sconces on each side to again, give the room more depth and draw your eye further. Creating an illusion of more space.

Don't get me wrong, I realize that people know there is no more actual space there. I get that a mirror will not fool anyone to think there is more space beyond it. That isn't the point. It's the illusion it creates and how it makes you feel when you walk into a room with well-placed mirrors. Rather than an enclosed feeling, it just gives a feeling of more space.

The same can be done with mirrored furniture in a room. A few pieces of mirrored furniture can be mixed into any type of decor if done sparingly. For example, my sweet little much-loved jewelry armoire from Pier 1 that you all have seen in the background of my videos for the past 3 years.

This is my little filming room/2nd guest bedroom. It's the smallest bedroom in our house, so it needs all the help it can get in the space department. A full set of traditional furniture would definitely not work in here. So I mixed and matched. My fav pieces are my mirrored ones in here. This piece is the only mirrored piece you see when you first walk into the room (my mirrored vanity I film from is on the opposite wall). Anyway, this piece placed at an angle gives the corner some depth and doesn't enclose the space. It reflects the rest of the room in a really flattering way.

Another one of my fav mirrored pieces of furniture lives in our little lofty hallway area. It's not a huge area, but it's not as small as a typical hallway. So adding this piece of furniture is great because it provides some extra storage and pretty-ness without looking intrusive or overwhelming for the space.  I also love the look of these as side tables in a bedroom. I ordered this one from Target years ago at a great price.

K, so you may have noticed the pretty little "sunburst" or "starburst" mirror above the bed in the little armoire photo. These can be so flattering above a bed. Over any focal point of a room, really. Whether it be a mantle, bed, etc... they're fab. Apparently, I have a bit of an obsession with these types of mirrors in our home. You're totally not going to believe me but I did NOT mean to have a version of these above every bed in our house. It just naturally happened when I was decorating. Promise.

Here it is again in that room (2nd guest bedroom)...
Oh, and the mirror is from Target.

and a grouped version in our larger guest bedroom (where guests actually sleep...haha...the "makeup" room above is rarely used for guests)...
These are from Ballard Designs (outlet)


Yeah, this one isn't over a bed, but it's still over the focal point of the room. In my newly redecorated office over my much-loved desk...
To see more of this room and how I basically redecorated without making any big purchases, click here for my Office Reveal post.

and my FAVORITE sunburst mirror of them all, in our master bedroom...
This one was a super lucky find from Kirklands years ago for $50. I've seen similar versions sold for 4 times the price!

You may also notice a few other mirrored pretties in this photo... The pretty "paned" mirrors leaning on our side tables. Seriously, these things weigh like 100 pounds each. When I bought them (another amazing $70 a piece find at the Ballard Outlet in Atlanta), I was hoping to hang them. But the weight scared me. So I placed a small strip of foamy non-skid drawer liners cut to the size of the mirror bases between the mirror and our side tables, so as not to damage them and so that they'd stay put. You can also anchor them in the wall with a wall hook and some picture wire to make sure they don't fall down, especially if you have pets or kiddos running around. Or just for your own safety, let's be honest.
Because I'm pretty sure these would squash me...
Anyway, these made our room look so much bigger! Our ceiling is vaulted in that room, so the wall that the bed is on is pretty short. These make the wall look so much taller and majorly open up the room. Again, it creates some depth for your eye when you walk into the room, since this is the first wall you see.

That's another big tip. In most of my rooms with mirrors on the walls, the mirrors are always on the wall you see when you first walk in. It keeps the room from feeling so enclosed. Not that you should always follow that tip. Placing them on awkward side walls (like I did with my peacock mirror) works great too. Just go with what is visually pleasing to you! After all, you're the one who has to look at it! :)

So speaking of "leaner" mirrors, I've used these in a few other places in our home.

In our little 2nd guest bedroom/filming room/makeup room (it has identity issues), sits this little pretty from Target. You may remember it from this post. Yeah, I caved.


Another leaner that gets a lot of love in our home lives in our entryway...
This 7-foot beauty is another super cheap find from Kirklands. That's another thing. Mirrors can be SUPER pricey. While most places seem to charge for their weight in gold, you can find some great ones if you know where to look!  You may pick up on a pattern in this post. I get a lot of mine from discounted places like outlets or from stores like Target and Kirklands. You can find some gems for amazing prices at those places!

Oh and speaking of not spending a lot, I am LOVING this idea I found on Pinterest (via ApartmentTherapy)

 SUCH a big statement just from hanging a few of those super cheap-o (I'm talking less than $20 each) mirrors that are meant to be hung behind a door. You know, those really flimsy mirrors...  When hung horizontally stacked like this, they create a really awesome statement. LOVING this idea.


Now for some tips on how I placed some of my fav mirrored accessories. A few of these well-placed beauties can change the look of a space completely.

My favorite, the mirrored tray.

This one holds some little apothecary jars full of treats in a corner of our kitchen. I love how it brought in a modern element to the kitchen and of course a little sparkle.  

This little tray in the center of our kitchen table in our breakfast area made our really traditional "farmhouse" style table feel a bit more modern as well.


and finally, this tray I've had for ages from Target years ago. It's lived everywhere in our home at some point, but I LOVE it on the nightstand in our guest bedroom.  It brightens up the little dark side table and mixes well with the dark antique furniture in that room to offset it a bit and give it a more glamorous feel.


I also love throwing in a mirrored picture frame here and there on a big bookshelf full of items. It gives it a little sparkle.  This one is from Target.

and Finally, my little cute mirrored jewelry box and mirrored lamps on our dresser in our master bedroom.
Years back, I removed the mirror that came with the dresser because it was HUGE. I added a little gallery wall of Target frames full of black and white images of landscapes of places we've visited.  Anyway, since this wall is mirror-free, I added some depth with the jewelry box and two matching mirrored lamps I've literally had since my early college days from Wal-Mart (lampshades are from Target). 


 Whew.... I told you it was going to be a big post! Hope you guys enjoyed seeing how I decorate with mirrors and that you picked up a few helpful tips along the way! Like I always say where decor is concerned, there are no absolute rules. Do what makes you happy and what makes you feel good!
Where are your fav places to find mirrors or mirrored accessories?

My Current Everyday Makeup Look & Tutorial

Hello and happy Monday everyone!

Thought I'd open the week with a much-requested tutorial...  My go-to (and super easy) EverydayMakeup Look has been my favorite way to wear my makeup as of late. It's a super flattering look that can be taken from day to night. That's what I love about it. It's always appropriate and fabulous!  It's also what I'll be wearing for Valentine's day. Hope you all love it!


Products Used:
Smashbox Camera Ready BB Cream
Defining Eyes Palette (save with code "TIFFANY")
Armani Eyes To Kill Mascara
NARS Laguna bronzer
NARS Madly blush
Maybelline Vivids Lipstick in Pink Pop
Sigma Brow Powder Duo in Medium


MAC Archie's Girls Collection SWATCHES

K, so you all have no idea how fun this collection is for me. A little story for ya... When I was little, I was obsessed with getting those thick little Archie Comic digest books at the grocery store. I loved them. So much that my car is named, ahem, Veronica. Yeah I have no shame.
And I name my cars.

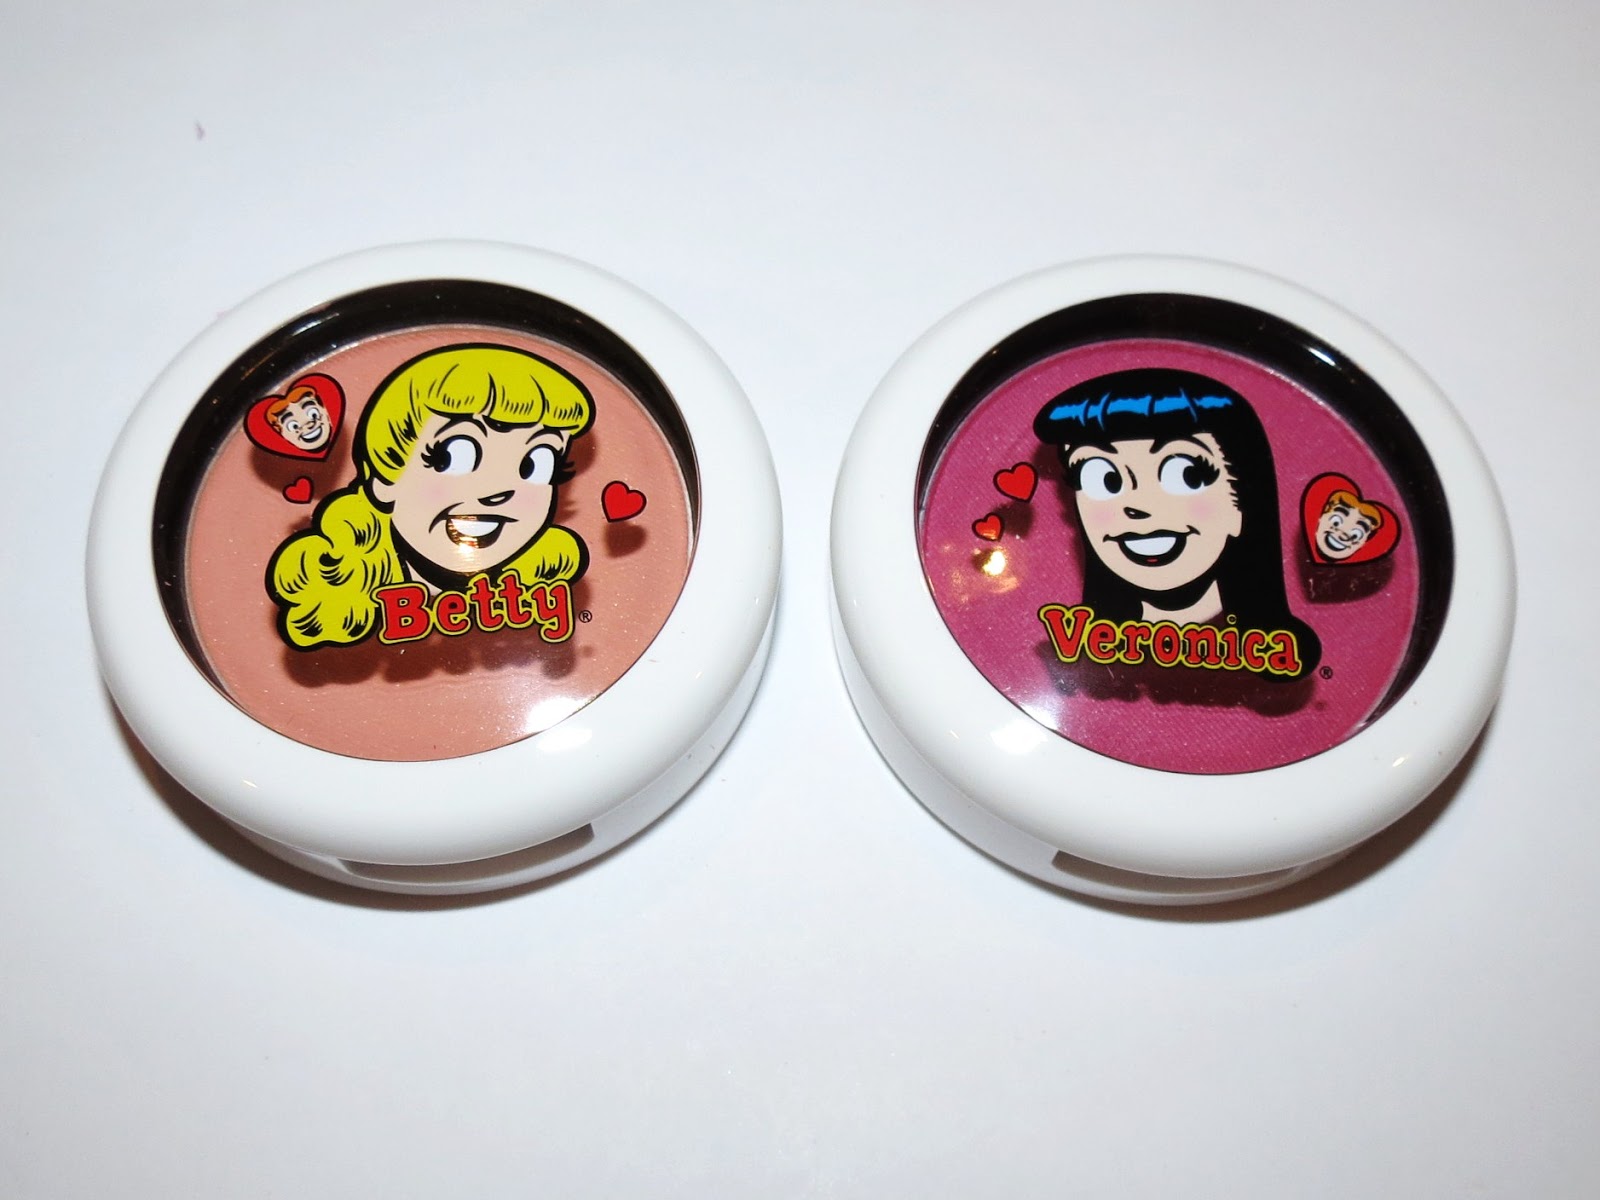
Ok back to the makeup... I think this is such a cute collection idea. The sweet, girl-next-door shades in the Betty half of the collection are offset by the deeper, more vivacious colors in the Veronica half.  Just in time for Valentine's Day.

The packaging is absolutely presh. With the likeness of either Betty and Veronica printed on their correlating products. Little sweet hearts and the comic likenesses of Betty, Archie, and Veronica make for such fun and happy packaging, reminiscent of the 1950's. SO cute, I can't even take it.

So while I was (obviously) instantly charmed by the collection itself and the packaging, the products and colors are the most impressive part. Which I have definitely not been able to say about a MAC collection in a very long time. Let's face it, the quality of the products IS the most important part.

Since I wanted to keep this post all about the swatches and photos, I'll save my specific thoughts for my video review which you can check out here or at the bottom of the page. So don't miss that if you want more of my thoughts on this collection and my must-have items.

So without further ado, here's the swatchy goodness...

*Keep in mind, this is not the entire collection, just the products I received.

MAC Archie's Girls
Available at all MAC locations February 7, 2013- April 4, 2013 

 lipstick, $16.50

 (l-r) Daddy's Little Girl, Boyfriend Stealer, Ronnie Red

Betty Bright


 Lipglass, $16.50
(l-r) Strawberry Malt, Feelin' So Good, Kiss and Don't Tell, Summer Sweetheart


Powder Blush, $22.

 (l-r) Cream Soda, Prom Princess


 Pearlmatte Face Powders, $30
 (above) Flatter Me, (below) Veronica's Blush

 (l-r) Flatter Me, Veronica's Blush


Eye Shadow x4 in Caramel Sundae, $44
(l-r) Cheryl Chic, Dreammaker, Caramel Sundae, Showstopper


Eye Shadow x4 in Spoiled Rich, $44
 (l-r)Pin-Up Purple, Spoiled Rich, Ron Ron Run, Gravel


Pigment, $23

 (l-r) Magic Spells, Black Poodle


(l-r) Lucky in Love, Cheers My Dear

Pearlglide Intense Eye Liner, $16.50

 (l-r) Black Swan, Patrol Blue, Designer Purple, Lord it Up

Opulash, $17.50
 Comes in original formula, Optimum Black (Betty), and a more volumizing formula, Bad Bad Black (Veronica)


Nail Lacquer, $17.50
 (l-r) Comic Cute, Pep Pep Pep, Past Curfew, Double Trouble


Yours Forever Tote (online only) $49.50


So are you more Betty or Veronica?

 Don't miss my "first thoughts" video below!


Products provided for consideration by MAC Cosmetics with no agreements or obligations to feature on my blog or videos.

Voluminous, Long-Lasting Curls PERFECT for Valentine's Day!

Two posts in one day? No, I haven't lost my mind. Just excited to share my new absolute favorite way of doing my hair with you all! Just in time for Valentine's Day! Or a girls' night... Or the grocery store.
You know, whatever.

I can't say enough good things about this method of curling hair. It's easy, it takes 10 minutes, and it lasts until you wash your hair next. Seriously. I've rocked these 2 days in a row before. Sleeping on them and everything. It's crazy.
I've been doing this for a few months now. So for those of you that have been curious about my hair in any of my recent Instagram pics where my hair is curled (ahem, you should totally follow me if you don't! I post pics daily), my recent Sigma Beauty store event, or from IMATS, this is the method I used! Basically any curled hair photos from the past few months, this is the technique.

I know I sound way too excited about this, but seriously, those of you who have ever had issues curling your hair, whether it's the difficulty or the fact that it looks great for an hour and then suddenly turns to crap, this technique is SO worth a try!
My issue with curling hair isn't the ease or that I can't spray the heck out of it to make it last, but because I have super straight and hard to curl hair, curling it could be stressful.  Stick with me... What I mean is that, sure it looked great when it was fresh, but wherever I was going, I would worry that it was falling or that depending on the weather (HELLO southern humidity), it would look totally different and curl-free when I got to wherever I was going.
This method is so great because I can BRUSH my hair. Yes, brush it...  It stays soft and super curly. For days.
and days.
Oh and it doesn't look like crunchy curls. Soft, easy, carefree hair. I love it.
Ok, you get it. I'm a little excited about this technique and so happy I've got a go-to method for curling my hair now.

Check out my video below for a full step-by-step tutorial so you can perfect this method too!

Here's a few things you'll need to get the look...

Paddle brush (mine is el cheapo by Conair. Don't spend your life savings on a brush. Just sayin.)
Paul Mitchell Hot off the Press heat protectant spray (miracle stuff)
Hot Tools 1" curling iron (any 1" curling iron will do)
TreSemme Tres Two Hair Spray
small claw clip


NEW Sigma Eye Shadow Bases SWATCHES & Review! (and new discount code)

Hello and happy Monday, everyone! So excited about this post... You guys have no idea how hard it has been over the past several months not being able to share these beauties with you all. I mean technically, I could have, but like I've said before, who wants to see someone raving about something that isn't available?
Not this girl.

So Sigma Beauty is now selling Eye Shadow Bases! They are available in 9 gorgeous shades that are sold both individually and in color-coordinated sets of 3. I'm obsessed.


Individuals.
I store mine upside down to see the color ;)

Before we get to the swatches and eye candy, here are my thoughts...

Over the past few months I've been using and loving these so much. They are seriously great eye shadow bases.
And yes, they are truly BASES.  It irks me that most cream shadows call themselves "bases".  I'm guilty of it as well.  But to me, eye shadow bases are a product that both grabs and intensifies your eye shadow color while preventing creasing throughout the day. Most products lack that whole crucial "preventing creasing" thing.

I've really been objectively testing out every shade and I can honestly say without a doubt that these are my new favs.  Even with my very oily lids that are super prone to creasing, these babies hold up all day. Whether worn on their own or with a shadow layered over it, they stay true to color and prevent creasing. 

And let's talk about the packaging.. I LOVE that they have figured out the whole "drying out" thing. We've all had a Paint Pot (or 6) that have dried out into a little shrunken mess before you can even get through a quarter of it. With these, while the lid seals tightly, there is also a little extra "cap" over the product itself to keep it fresh until you use every bit.

Ok so without further ado, here's the details and the swatches!

available individually, $13
 available in 3-piece kit, $36 
use discount code "BASE2013" to save 10% off your order!!
3-piece kits.
  I think these are the best buy because you get a cheaper price per base, and you get a little brush to apply them with.
Here's the inside...


Flare Eye Shadow Base Kit
(l-r) Provoke (Matte nude-peach), Spy (duo-chrome green-maroon), Pursue (shimmery purple) 


Bare Eye Shadow Base Kit
 (l-r) Persuade (matte nude) , Sculpt (shimmery charcoal), Pose (shimmery brown)
*Persuade is a  color dupe for MAC Painterly Paint Pot


 Dare Eye Shadow Base Kit
 (l-r) Unveil (shimmery gold), Dash (matte plum), Strike (shimmery burgundy)

Click here for all the eye shadow bases on the Sigma Beauty website and SAVE 10% off your entire order with code "BASE2013"

 So what shades are your favs?? My most-used shades so far are definitely Persuade, Pose, and Sculpt... Which happen to all be a part of the Bare Kit.  I'm also LOVING the Pursue and Strike shades. It's kind of awful to try and pic my favs. I love them all! 
So which shades are you eye-ing?? 

Expect to see these used in a lot of upcoming tutorials!