Most-Used Beauty Products - April 2014

So as many of you know, every month I share my favorite, "stand-out" products from that time period.
This month is no different, but I feel like I chose the products in a more helpful (hopefully) way that really hit every category, rather than just mentioning a handful of randoms.
So when I was grabbing for my products to talk about for the video (which is always easy because I definitely have those stand-out products month after month), I took it category by category choosing my most-worn products.  From foundation, brows, lip products, liner, etc... It's all represented.
...Which definitely made for a longer list of favorites, but I feel like it's more comprehensive and accurate to what were actually my favorites for the month.

I hope you enjoy my picks!


my picks...


Chanel lipstick in Radieuse (no longer available, similar -MAC Creme Cup)

what I'm wearing in the video:

See you all tomorrow!!

post contains affiliate links

Classic and Distressed OOTD

Happy Monday Loves!

Just sharing with you all a look I wore last week to my mom's birthday dinner that I really loved and was so easy to put together. 

I LOVE pairing more classic pieces like the vintage-looking sheer lace top, my Chanel classic flap bag, and classic red pumps with something a little more edgy like these distressed denim skinnies.


the look:


top: Express
denim: Express
shoes: Nordstrom (SJP Collection) (So happy these are finally back in stock!)
sunglasses: Tom Ford
spike bracelet: Stella & Dot
gold cuff bracelets: The Current Custom

I hope you all have a wonderful day! See you tomorrow!!

post contains affiliate links

My Spring/Summer Wardrobe Essentials

I don't know about you all, but I am so ready for the weekend! Aren't we always though? I'm looking forward to more of this gorgeous warm weather! Looks like Spring finally got the memo around here. ;)

When the weather warms up, I'm always inspired to create some videos/posts all about some of my must-haves. I'm planning a beauty edition as well, but I thought it would be fun to start with some of my most-loved wardrobe essentials for the warmer seasons!

I hope you enjoy!!

**Just wanted to let you all know that the giveaway for the Hourglass Ambient Powder Palette ended today! The winner has already been contacted (and responded) so thank you all for entering and watching my videos! I love you guys!! More fun coming soon...


MY LOVES...


post contains affiliates

Light n' Breezy Curtain Sheers

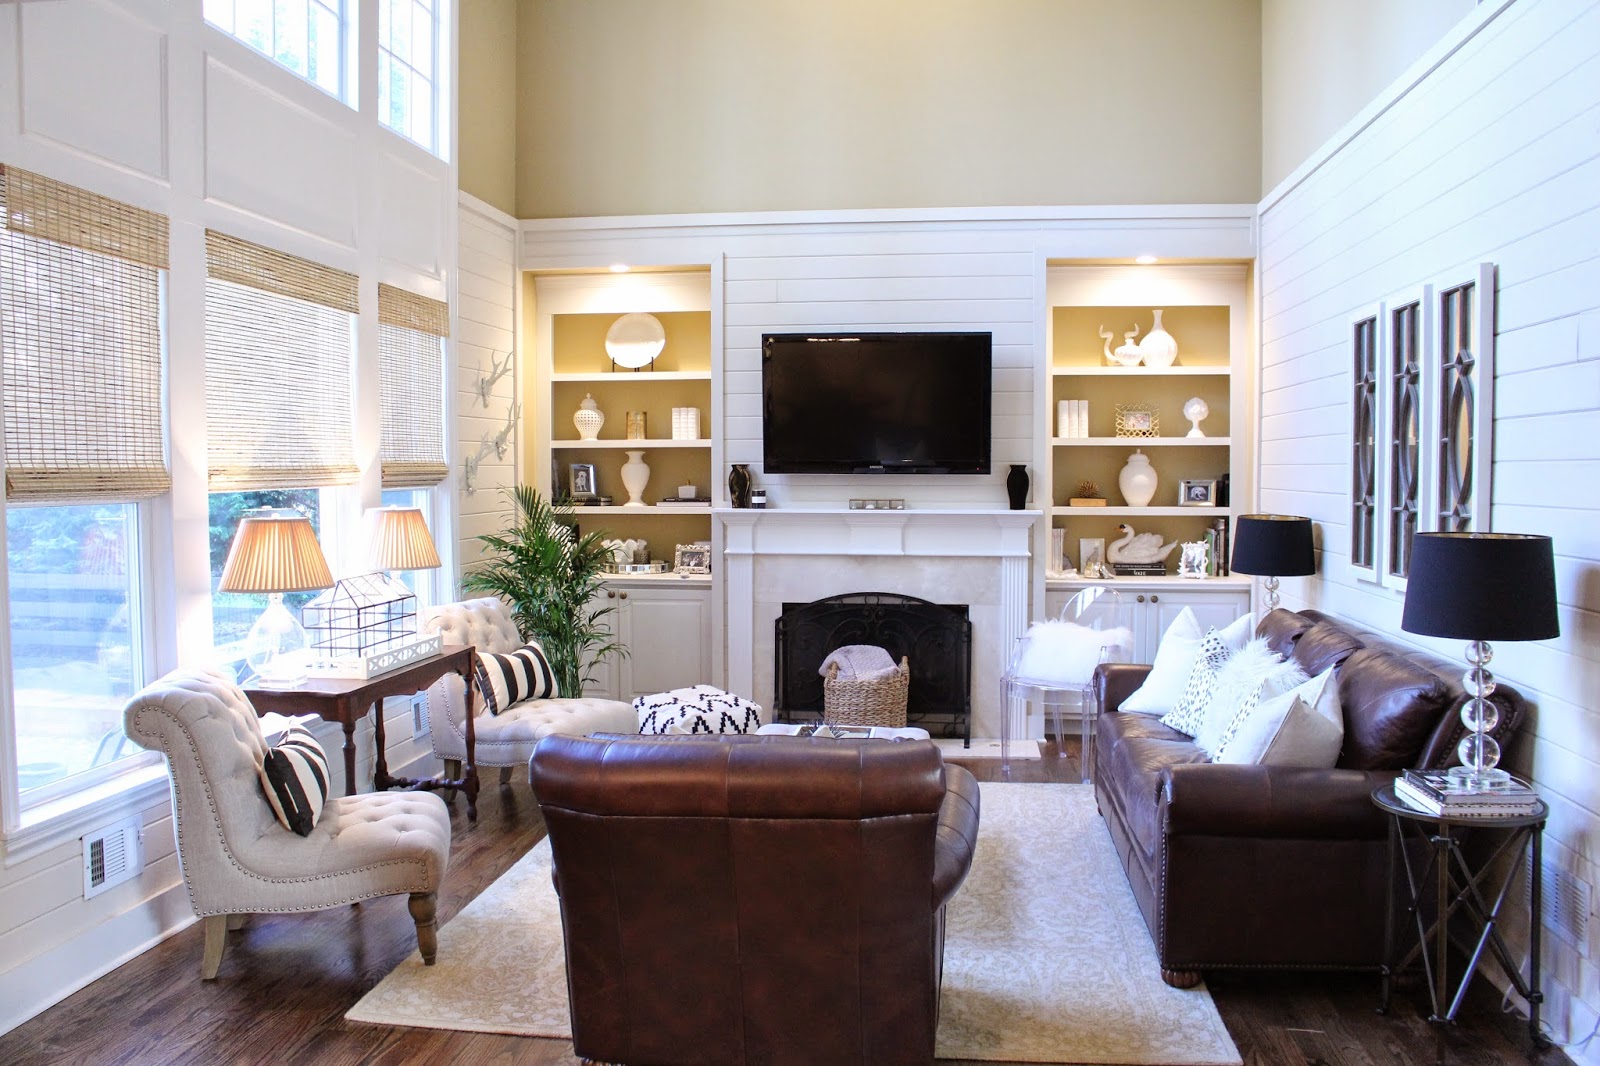
Last we spoke about the family room, we had added some pretty new bamboo shades and the windows were sort of begging for some drapery.

They totally were, I swear.

I decided on some soft-looking white sheer panels.


Seriously, white sheers would have been the last type of curtain panels I would have ever thought of choosing. But after really thinking about what had held me back in the first place from putting them up right away (I didn't want to block any of the pretty natural light in this room), the decision was a practical one.

...Which luckily ended up being super pretty!

I love how soft and billowy they look. 


Another reason I had held off for so long on these was because beside the fact I wasn't 100% sure on what type I wanted, I knew we'd have to have super long ones (120"), which would end up costing quite a bit. So I knew I had to be absolutely sure.

Well, these were majorly affordable.  
No, seriously. They were $23.99 a piece. 

boom.


I got four of the "Soho Voile Lightweight Sheer Grommet Panel" in winter white from Curtainworks online. 

I'll be honest, the word "shimmer" in the product description scared the crap out of me and I was worried about how nice they would look for the price. I definitely took a chance. But I'm so happy I did. They look super nice and give the room a more luxurious vibe.  I'm majorly impressed!

And for the record, they have zero shimmer to them whatsoever, thank goodness.

I also really love how these are grommeted. At that height, the grommets help them open and close easily if we ever wanted a little more privacy. They also keep them looking perfectly pleated and more "arranged" at the top, rather than more bunched up like pole pockets can sometimes look.

This photo below shows just why I didn't want to block any of the light or pretty view...


Ignore the messy cords... When we pulled the table out to put up the curtains, I didn't arrange them back in their little Command Hooks. Do you guys do that? If you've got a table like this where you can see a massive cord explosion behind, you can just grab some clear command hooks and sort of run the cord through them to keep them straight and out of view.  Cords drive me nuts. Tell me I'm not alone on that... haha

Just for fun, here's a pic of what the room looked like over there about six months ago...


...and what it looks like now! So crazy how different the paint can look in here depending on the lighting!  And because I'm super helpful, I have no idea what it's called. It was newly painted that mystery shade when we moved in.


So what do you all think?? We're really in love with them. I was so impressed with them that I ordered four more for another space. I'll share it soon!!


MAC Proenza Schouler

Happy Hump Day, Loves!
Today I'm back with another MAC collection post! If you missed my MAC Playland post earlier this week, check it out here.

Today, we're moving right along with the very fashionable MAC Proenza Schouler collection...


I mean, dang. Could the packaging be any harder to photograph....

MAC Proenza Schouler
Available now online 
In-store April 24th, 2014
through May 22, 2014


Out of all the new collections, this is definitely the one I was looking forward to seeing in person the most.
First of all, this collection makes total sense to me. If you're familiar with the Proenza Schouler brand, the look and feel of the line is fun and sophisticated. Classic, modern shapes and lines, but with a sophisticated edge and a pop of color here and there.

To me, the colorful gradient packaging is a bit unexpected and really fun to see from MAC. I gotta admit... I got a little excited to see square MAC lipsticks! Yet, the colors themselves are very classic (but still fun).

The collection includes four Lipsticks, two Pro Longwear Lip Pencils, two Blush Ombre blushes, two Pro Longwear Eye Liners, four Nail Lacquer shades, and one 129SE Powder/Blush Brushes.

Let's check out the products I have!

First off, the lip products:

Lipsticks: $22 each
(left-right) PINKFRINGE vivid flamingo pink (satin), MANGROVE bright clean orange-red (matte)


Pro Longwear Lip Pencil: $21 each
HIGH ENERGY bright orange-red cream


You can see from the swatches above, these are pretty solid lipsticks. If you love bright orange-reds, you HAVE to try Mangrove. I'm not a huge red lip kinda' gal, but I need to psych myself up to wear this one. Orange-reds are so big for Spring and Summer!
Pinkfringe is absolutely gorgeous. The pink lipstick lover in me totally swooned over this one. It's not super opaque and scary at first swipe. It's very build-able. Because of that, this one is a winner for me.
I also have my eye on the Woodrose shade which I don't have. It's more of a nude pink. I think I may have to place an order for that one...
The lip pencil in High Energy pairs absolutely perfectly with the Mangrove shade and has the most perfect formula. It's creamy and transfers to the lip wonderfully, however, it's not one of those super creamy lipstick-like lip pencils that will wear off in twenty minutes. This one will last ALL night! If you filled in your lips with this beauty, then layered on a pretty red, you'd have red lips for days.

Literally.

Next, I have the Nail Lacquer in Thimbleweed.  I'll spare you any photos of this one because it's pretty horrible. Sheer, streaky, nude. Even with three coats. I feel like if I ever feel the need to do a third coat of polish to make it look good, it's no good in my book. There are so many great polishes that don't require a goopy third coat to make pretty. I struggle with MAC nail lacquers. I feel like they could make them so nice! Some I've tried are great, but I'd say a solid 80% of them I've tried over the years are exactly like this one. I just don't get it.

The last product I have from this collection is the 129SE brush (you can see it pictured in the first photo in the post. I was shocked that this little thing is $38! It's the size of a travel brush. This one is going in my purse for touch-ups. While I think it's a great little brush, I'd probably skip it for the price. If you really want a 129 brush, I'd go for the full-sized one (it's a few dollars cheaper).

So that's that for Proenza Schouler for MAC! What do you all think?? The lipsticks are definitely the stand-outs for me...  What are yours??


Products provided for consideration by MAC Cosmetics with no agreements or obligations to feature or review. Post contains affiliate links.

How I Get CRAZY Long & Thick Lashes

In my (almost) six years of doing beauty videos and blogging, my most commented-on and asked-about features are my eye lashes.
I totally get that mine are naturally pretty good, but they definitely don't look the way they do without the help of some great products.  I know I'll get questions about this... So I'll go ahead and tell you that I do not use any lash growth serums of any kind. I wish I had a magic formula I loved that I could recommend for growing lashes, but I don't. So for those curious, that's that.

This lash trickery is all about products and techniques.

Even if you don't have great lashes,  you can definitely make them their best and beef them up a bit and make them their best with a few of my favorite products and trickeroos.

So while I think no look is complete without some mascara, this look goes beyond that. For those days when you want something a little extra (without using false lashes, which aren't my favorite).

I hope you all love the look and maybe pick up a life lash-changing trick or two!


Products used:


post contains affiliate links

MAC Playland Collection Swatches & Review

Hello Loves! I hope you all had a wonderful Easter!

MAC has SO much good stuff right now... Seriously.
This week, I'll be sharing a lot of new pretties from the new collections, so look for more of these posts throughout the week!

Naturally, I had to start with this super bright and fun collection that very much reflects it's name, Playland.


Available online and in store now
through May 29, 2014


The collection contains 6 Lipsticks, 5 Lipglasses, 3 Casual Color pots, 4 Pigments, and 4 Chromagraphic Pencils all in super bright and playful shades.

Let's check out what I have from the collection!

First off, the lipsticks:


$16. each
(left-right) RED BALLOON hot fuchsia (amplified), PLAYLAND frosty yellow gold (frost), TOYING AROUND hot coral pink (amplified)


Seriously, whoa.
First of all, I LOVE the amplified formulas for super bright shades like this. It gives super opaque color, but still with a gorgeous shine which makes the shade really come alive. Both of the amplified shades are gorgeous, but Toying Around is my favorite. Playland is a little more daring, but is actually pretty sheer so it could be layered over brighter shades for a more dimensional look.

Next up, (probably my favorite products I have from this collection) two of the Lipglass shades:


$15. each
(top-bottom) CAROUSEL creamy pink, LIVE IT UP creamy orange


Crazy gorgeous, right? These are so pigmented and opaque! I love love love them. Especially the gorgeous orange. 

Next, Chromagraphic Pencils:

$16. each
(top-bottom) HI-DEF CYAN hi-def cyan, GENUINE ORANGE bright orange


These pencils are serious business. You can definitely see what amazing payoff they have, which is pretty unique. The consistency is perfect, in that they transfer to your skin like that of a creamier pencil, however, they really have a drier feel that instantly "sets". These are awesome for creating bold and daring pops of color really anywhere on the face.

And finally, two of the Pigment shades:


$21 each.
(left-right) HI-DEF CYAN cyan blue, EVER SO YELLOW soft yellow with pearl


Hi-Def Cyan is one of the prettiest pigments I own. You can see just how opaque and bright the color is. It's so beautiful!  The Ever So Yellow isn't quite as opaque after it's first blended, but it is very build-able which is nice.  It can be worn sheer as a soft wash of pearly yellow, but can easily become the bright yellow shown in the swatch with a few layers of color and some blending.

The collection is available now in stores and online here.

What are your thoughts on this collection?? Any favorites? What stands out to you?


Products provided for consideration by MAC Cosmetics with no agreements or obligations to feature or review. Post contains affiliate links.

Spring/Summer Foundation Routine & AMBIENT POWDER GIVEAWAY!

For me, when the weather warms up, my foundation routine changes. I like a more simple routine consisting of fewer, more lightweight products.  This current routine has been so perfect for me lately, that I just had to share!

In addition to the tutorial, to celebrate all this wonderful warm weather, I also wanted to share some of the Ambient Lighting Powder love with you all.  So I decided to do a little giveaway with probably the best Ambient Lighting product ever... The Ambient Lighting Powder palette. When it made it's debut months and months ago, it quickly sold out (not surprising). Well, now it's back at Sephora and readily available! *Get all the details for the giveaway at the bottom of the post!  I hope all of you get the chance to enter!!

So I went pretty in-depth for this tutorial... I didn't want to skip anything! I just think perfecting your skin is probably the most important step in your entire makeup routine. If you get your skin right, everything just works! I hope you enjoy it!


Products Used:
Lorac 3D gloss in Polished
Sigma Beauty brushes: DISCOUNT: Save 10% off your entire Sigma Beauty purchase! Click here  and enter code "TIFF10" at checkout
not shown:


*GIVEAWAY RULES AND DETAILS*
1. Subscribe to my YouTube channel here
2. Follow my social media pages below:
INSTAGRAM
FACEBOOK
3. Comment on the YouTube video above (one comment per day) telling me your must-have warm weather skin product. *PLEASE NOTE YOU CANNOT ENTER BY COMMENTING ON THIS BLOG POST*
4. Make sure your YouTube account is set up to receive private/personal messages
5. Giveaway will be open for entries until April 30th, 2014
*(edit 4/23/14) GIVEAWAY WILL END ON April 25th, 2014.* 
6. One winner will be chosen at random and I will contact you via YouTube private messages
7. GIVEAWAY IS OPEN INTERNATIONALLY!
8. GOOD LUCK!! 

post contains affiliate links

Beauty Samples Idea...

Gotta love when a decor post has a little bit of beauty and makeup mixed right in...

While yesterday's closet tour post/video already related to decor, I still didn't want to skip this week's decor post completely so I thought I'd share a simple little idea that I guarantee everyone reading this post can do. Seriously, you've got the stuff to do this, I promise.

Especially if you shop at Sephora, which I know a lot of you all do!

If you're like me and shop there often (or any other beauty store really), you've probably got a shameful hoarding situation stash of various samples somewhere in your house that you're not... sampling.  When I was rearranging my makeup/filming area in my closet last week, I found a big basket of them.  When I looked in, all the colors of the different sample packaging was kind of pretty. Which gave me an idea...


I grabbed one of my big apothecary jars from a kitchen cabinet that contains a hoarding situation all it's own. I also have a shameful stash of apothecary jars of various sizes, but that's a whole other story.

For more on our guest bathroom makeover, check out this post!

So I dumped them in a big jar and placed it atop the counter of our guest bathroom grouped with a yummy-scented candle and possibly the cutest little Hermes travel soap and dish I ever did see.  I grabbed that at a hotel I stayed at in Minneapolis a few years ago. Not from the nightstand or anything... But all of their little free travel toiletries were Hermes!! Inside is the most precious orange-scented soap. Sort of regretting not snagging a few more (or 27) of them while I was there.  Note to self: When you can get free Hermes anything (even travel soap), YOU TAKE IT.


Seriously cute, huh?

Such a fun way to add some color and put to use some of those samples that you may be stashing! Plus, it's fun for your guests to grab a few new things to try while they stay with you.

If you don't have any apothecary jars like this, no worries! You can use any clear container, vase, bowl, anything! Be creative.

Speaking of apothecary jars, this little update made me bust out my big jar of bath bombs from underneath the cabinet in there that I had never found a real place for. So I just placed it in a little basket by the tub.


This is my favorite way to store them because they stay fresh, are easy to see, and most of all, it just looks pretty.

Here are some canister ideas!


So what do you guys think? What do you do with all those little samples??


post contains affiliate links

Updated Closet and Makeup/Filming Area Tour!

Hello and Happy Monday Everyone!

Since the little vanity/filming area switch-a-roo in my closet occurred, some of you have been curious about how it changed the overall set-up of the room and whole closet system arrangement.

It really made a huge difference!


Before I get ahead of myself, if you haven't seen my last few weeks' worth of videos, I decided to switch up my filming area a bit.  My main issue was that my vanity table where I do my makeup and film my videos got zero natural light. I was sick of all the weird lighting issues I was having so I decided to put my vanity area right in front of the window.


Seriously. Awesome.  Totally should've done that from the beginning.

Now, when I want to do my makeup, I can just sit down and go for it without turning on a million lights and blinding myself.  Plus, natural light is always best for doing makeup anyway.  Most of all, it's best for filming. 

Since the change-up, I've been so happy with how the lighting has looked in my videos. I still keep the little lights on the side (those on the little stands) just to add a little brightness when filming and they work like a charm.

The switch wasn't just a simple switch though. When the vanity moved to the window, two of the largest cabinets had to relocate as well.  

I was going to sort of turn this video/post into a review of the Ikea Pax system, but it would be the shortest review in history. One word = Awesome. The whole system is amazing and worth every penny. We're still so happy with them.

So we moved the Pax unit on the left (the one with my tops), over to the area where my Ikea Alex drawers (that hold all my makeup) used to live. Totally love those too.


That was NOT easy... 100% credit to Brad on that one. 
Then, I moved my purse cabinet (Ikea Hemnes) inside the little nook where the vanity table used to be. Thankfully, it fit perfectly.

That little area used to be the closet to this room.  I explain it more in the video, but basically, we have a huge master closet that we could have easily fit all of our things into together. But since I wanted to film at my real vanity (where I naturally get ready and didn't want to create a fake "set" for filming), I knew I'd need more space for the table and some natural light. Plus I wanted it to look pretty. 

So when we moved in to this house about a year ago, I decided to use this little room which is right next to ours. It's a funny little room that was probably meant for a nursery or something, as it's adjacent to the master, has no bathroom of it's own (the other bedrooms do), and is just far away from the other bedrooms but right next to ours.
So it just made sense. Meanwhile, Brad is chillin' with a mega-sized closet all to himself.  ;)  Well, we do keep other things in there like all of our coats and a large piece of furniture (super tall and wide chest of drawers) that is filled with his things anyway. So it works out perfectly
Most of all, I love that the closet is close by so it actually feels like a closet and not some random room. It's actually the same distance from our bedroom as the real closet is.

So that's the little backstory. Back to the details...


I woke up Waylon when I took this. He looks a little startled...haha. He loves this room. It must feel really cozy to him with all of my clothes.

Here's another shot of the little nook...


So this now holds my purse cabinet. SO happy I left that original closet rod/shelf at the top while my vanity was in there. Now, I have SO much more space to hang pants and long dresses.

But most of all, the new filming space/makeup area is awesome. 


So what do you all think??
Be sure to check out my new video below for more details on this space!!


details:
mirrored vanity & armoire: Pier 1
necklace dome cloche: Pottery Barn
Ikea Pax closet system
Ikea Hemnes cabinets (glass front cabinet & two side towers)
Ikea Alex 6-drawer units (I stacked 2)
hangers (THE BEST HANGERS) The Container Store
paint color: Sherwin Williams China Doll
little chair: Frontgate Outlet find
curtains: Striped blackout curtains from Half Price Drapes
perfume tray: (no longer available) SIMILAR at West Elm


post contains affiliate links

More Shade... and Some Family Room Updates!

Well last night we finished hanging the rest of the bamboo shades in the family room and kitchen.


In last week's decor post (if you're new here, I throw in at least one home decor post a week), I updated you all on our dining room... the first room we converted from regular old white blinds to bamboo shades.

Well since we needed some custom sizes for one of the large family room windows and for the window above the sink, I searched the internet for affordable custom bamboo shades (which was kind of a joke considering most sites that claimed to be "affordable" would have charged upwards of at least $400 total for six more shades we needed).  I found the holy grail of bamboo shades, y'all. Seriously.

Overstock, you are my bro for life.


I went with these, mostly in the 74" length for most of our windows (with the exception of the kitchen sink window, which I got in a 54" length).  
I'm kind of obsessed with how you can select the exact size (width) you need, down to the inch for each and every window.


Oh, hi disgusting fan blade... Calling an electrician soon to swap it out for something lovely! So naturally, I gave up on cleaning it.

Total, I spent around $160.  I had a 15% off code AND they were on sale!  But even without all that, they're so much cheaper than similar alternatives.

I think bamboo shades add a lot more to a room than standard white blinds. They add some texture and a more custom feel, I think. And yes, now those family room windows are screaming for some drapery. I actually ordered some a few days ago and I cannot wait to get them! I'll keep you posted...


Like I mentioned in my previous post about these, our backyard is very private, so we went with the unlined version. At night, you can see lights inside, but no real details.  Because of that whole privacy factor, we won't be adding these to the front of the house (especially since the front of the house has nicer, wide wooden white blinds already).


Did you notice a few other little changes??


How sweet is that little terrarium? He's actually pretty fancy... We found him at a local furniture and decor consignment shop over the weekend.  I've seen pretty terrariums (half this size) go for at least $50.  We scored this guy for $20.

I also switched up the lamps to some that I purchased from Target years back.  They were chillin' with some el cheapo-looking plain white drum shades in storage (that I believe came free with some old lamps I got from Homegoods a while back), so I ordered these pleated fabric beauties from Amazon.  I feel like they add even more texture to the room and look a bit more traditional and luxe. I like to mix it up...

Back to the terrarium... I want to put some pretty pink flowers within it. Or maybe just some pretty greenery.

Oh and did you notice another change??


Yep, I painted the back door black (I used black onyx in a high gloss by Glidden). The old plastic blinds that were there before were hiding such a beautiful door! I think the new little terrarium plays off of it well and the whole door itself sort of goes with the French doors in the foyer that lead into my office/sitting room.


Here's a better shot of the lamps...


 And one more shot of the kitchen blinds...


Pretty obsessed with these. I'm absolutely loving how this area of the house has really come together over the last few weeks with just a few new additions. What do you all think? I can't wait to get the drapery up!

Have a wonderful weekend!!